To give users maximum flexibility for setting up their individual routing scenarios and still keep adjustments easy, the Cloud PBX makes use of two “connections points”. One of them are “extensions and call groups”.
In this article, we will walk you step by step through the setup of an extension or a call group in the Cloud PBX.
Setup steps
1. Access your Cloud PBX
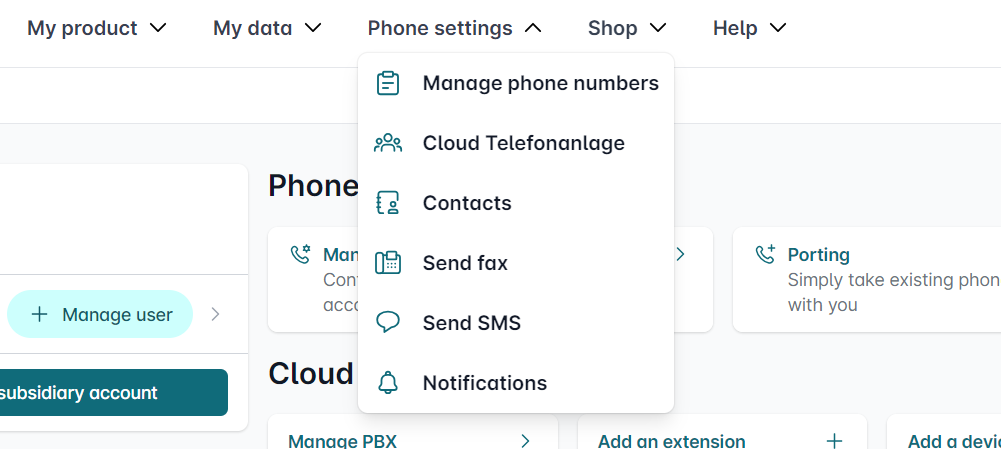
To begin, please call up my.easybell. In “Phone settings” you will find the box “Cloud PBX” in the “Connections” tab.
Please click on “Enter Cloud PBX“.

2. Add extension
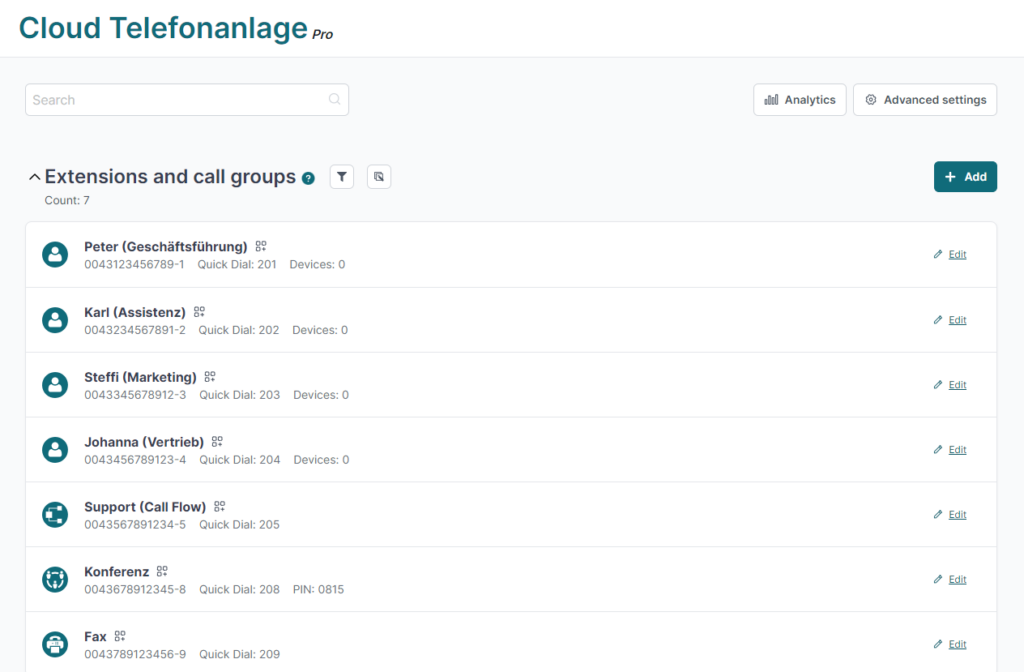
You reach the overview page of your Cloud PBX. Please click on “Add” next to “Extensions and call groups”.

3. Configure extension
The extension setup is divided into several sections, which you should set up in order.
3.1 Basic settings

Name: A reasonable choice of name will help you to keep track if you use many extensions.
Extension type: Mostly extensions will be used for calls. But you can also use the extension for receiving faxes (“Fax2Mail”), as conference room or even as interactive voice menu (IVR).
Number mode: In the “Head number of a number block” mode, phone numbers and number blocks can be extended, and thus several extensions can be operated via one trunk.
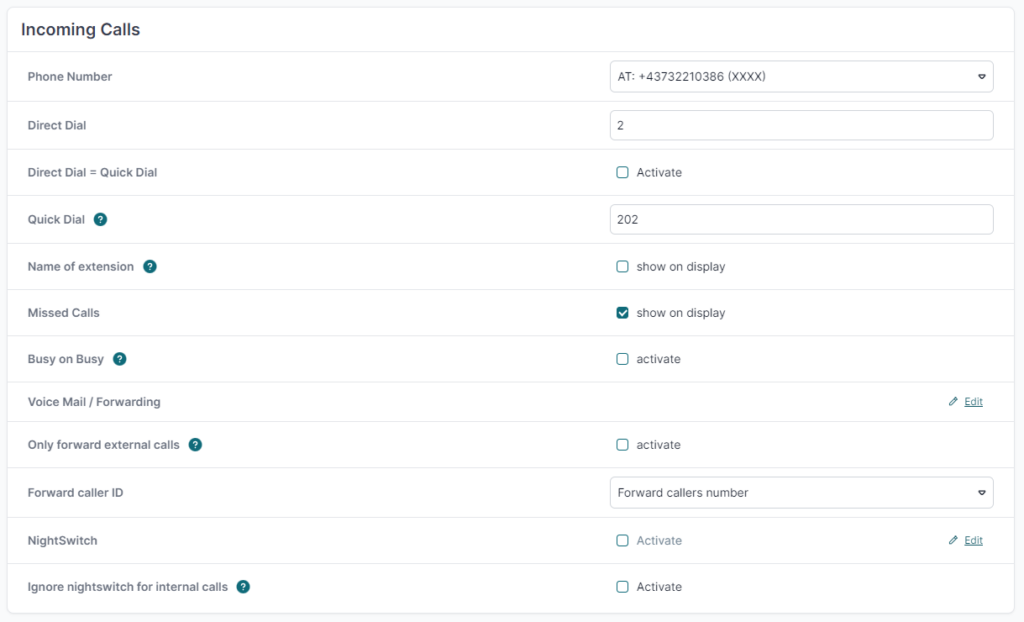
3.2 Incoming calls

Phone number: In the next step, select the phone number or phone number block (trunk) for incoming calls.
Extension / Quick dial: For call number blocks, assign the extension number, which usually also serves as a quick dial.
Name of Extension: You can select whether the name of the extension is displayed for incoming calls. This can be helpful if employees are responsible for several extensions (e.g. press and support hotline) so that they can handle the call appropriately.
Missed calls: Do you want missed calls to be displayed? Then set a check mark for “Yes”.
Busy on Busy: If a device is busy, further incoming calls are rejected with “Busy”, even if other terminals of the extension are actually free. Please also refer to our detailed information on “Busy on Busy”.
Voice mail / Forwarding: Click on the gear icon to set up the answering machine or call forwarding for this extension.
Night Switch: For more information on this function, see Activate after-hours switch for an extension in the Cloud PBX.
3.3 Contact settings

Store your contact data in case you want to be notified in case of call forwarding. However, this is not mandatory for setting up the extension for the time being.
3.4. Devices

Assign the devices on which you want to use the extension. As long as you add only one device, it is an extension. If you add more than one device, the extension becomes a call group.
If you have not yet set up any devices, you will be forwarded directly to the setup of the first terminal after saving.
4. Finalize setup
Click on “Save“.
Your newly created extension or call group is now listed in the overview under “Extensions and call groups“.
